What is Skateboard Griptape?
Skateboard griptape is essential for board control. It gives you grip where you need it. I will show you how to put it on and give some ideas for how to jazz it up too.
Skateboards are controlled by your feet. That means there must be a way to grip and control them using only your shoes. Enter grip tape.
Griptape is a sandpaper sticker that is applied to the top surface of your skateboard. It gives your feet lots of grip to stick to when doing tricks.
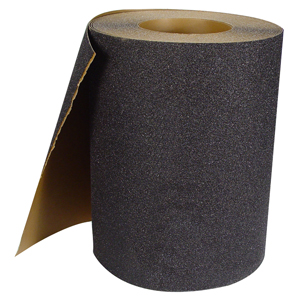
Usually coming in rolls you can also buy single pieces that give you patterns and graphics. I like to use plain black griptape that covers the entire top of the board. My board gets trashed pretty good and doesn't usually last long. So I don't bother with custom stuff very often.
For those who like to get their board looking sweet you can do them up however you want. You can get all different colours, camouflage, leopard print, shake junt brand or whatever.
Cut out patterns of grip and place it on. Cut it out first and then stick it on. If you try to cut it while it is on the skateboard then you risk damaging the deck.
I made this mistake early on and the board actually broke along the lines I cut.
Don't do that!
Once you decide what you want then you have to put it on the grip tape a simple yet tricky process.
Putting the Griptape on the Board
Putting skateboard griptape on your new deck can be tricky if you don't know how. Taking that huge sticker with rough sand paper on the back and fitting it on your awkwardly shaped skateboard seems impossible.
There are many ways that you can put grip on the skateboard. I will show you how with the least amount of tools and without scratching your hands. You will save and use the scraps from the grip to add the final finishing touches.
Follow these steps for full skateboard griptape and you will have no problems. No bubbles or crooked layers of grip and no bloody fingers.
Tools you will need:
- Screw driver. With a rounded metal stem
- Something to cut with like a box cutter. Be sure that it isn't a good knife because it will get trashed. Scissors suck for this, don't use them. The coarse sand paper of the skateboard griptape will rip any edge to shreds. Don't worry. The knife you use doesn't have to be too sharp. If you do things right it won't matter.
- You need a place where it can get pretty dusty and gritty to do the work. This process will produce a lot of coarse sand and sticky bits. The kind of stuff that will scratch and ruin floors and furniture.
Now that you have what you need. This is what to do:
If you are using a roll measure the length you need by stretching it over the deck. Give an inch or so more than the length of the deck for enough to fit it on nicely.
- Place your deck out flat in front of you. with the nose and tail at each of your hands. Hopefully on something that it won't slide around much on.
- Cut your piece.
- Take the piece and decide which way it will face with respect to the nose and tail.
- Pull the backing off carefully and save it. Try not to get it stuck on anything before you place it on the deck. Be very careful not to let it stick to itself. That is a real pain to unstick.
- Keeping the grip out stretched. Lightly hold the grip on each end in the center with your thumb on top and two fingers on the sticky side near the edge. Don't hold too hard, you don't want your fingers to get stuck to it.
- Position the outstretched grip over the deck and place a small part of it on the top of the nose with enough to cover the edge. Make sure it sticks a little. You are making a temporary tack to line up the grip.
- With the grip stuck on the end you can now position it to line it up with the rest of the deck. Rotating slightly around the sticking point to get the grip lined up with no missed spots.
- Now that you are positioned properly, lightly stick the other end to the end of the tail.
- You now have both ends lined up and stuck just enough to keep things lined up. There should be enough grip to cover the deck from end to end.
- From one side slowly start sticking the skateboard griptape down the kick. Stick lightly and evenly. Making sure that no bubbles are being trapped.
- Work your way all the way to the other end. The tack that is stuck to the top of the opposite end will pop off when you get closer to it. Let it. You are lined up nicely and don't need the tack any more.
- Now that you have placed the grip on and lined up it is time to smooth it out.
- Take the backing from the grip and place it over the deck with the shiny side up. Now run your fingers all along the deck on the slippery shiny side. Get all of the bubbles and un even areas blended out. Using the backing for this makes it easy and it won't rip up your hands.
- Be sure to only stick on the top of the board and not over the sides.
- With the skateboard griptape stuck evenly on the top. Take the deck and make sure that it isn't stuck too much on the curve at the edge of the deck.
- Now you want to mark the edge of the skateboard griptape for cutting. Take your screw driver. Using the rounded metal part and not the bit or the handle. Grind the driver along the top edge of the deck to make a white line in the grip. Use short swipes that are about 6" long and work your way around the deck. Using the "natural" top point of the deck as the grinding spot.This will leave a white line and remove much of the sand on the paper making it easier to cut. You need to make a mark and get rid of most of the sand material at this point. You will use the knife to cut through this mark.
- Again make sure that the grip is peeled off to the mark. Adjust where you need to.
- Make relief cuts in the grip at the beginning on the kicks on both sides. Four cuts in all. Use the knife delicately and in a sawing motion cut straight into the mark. Do not cut into the deck!
- Take the knife in your cutting hand and the deck in your other with a brace to help cutting. Either on your lap or a counter.
- Hold the deck perpendicular to you now and start the cut at one of the reliefs. Use a slight sawing motion to get things going. If it goes well you will be able to slide the blade though and cut a nice straight line along your mark.
- Cut off the scraps by starting at one spot and going all the way around. Save the end pieces and get rid of the side pieces.
- Use the screw driver in the same way as before and try and clean up any rough edges.
- Take the end pieces and fold them on themselves and use them to sand and clean up the edges more.
- Poke the mounting holes through with the screw driver and spin it in the hole to clean out the scrap. Pull the scrap out and discard.
- It is pretty much done now. I have a few finishing points I like to do.
Optional.
- I use the scraps to sand over the top of the deck a bit. It makes swirly marks and I just like to dull the skateboard griptape a tiny bit.
- I usually poke the hardware holes using the mounting hardware. Poking up through the bottom and then cleaning out the little circle.
- Once the deck is on the trucks and at the first skate I will take the board and hold upside down it by the trucks. I will rub the nose and tail is a twisting pattern on smooth ground. The does the final clean up and seal of the edge of skateboard griptape.
Then I am ready to go. If you followed this then you will be ready too. Look forward to photos and video on the process sometime soon.
Return from Skateboard Griptape to Skateboard Parts
Return from Skateboard Griptape to skateboardhere homepage
Land Tricks Faster and Support this Site.